One of my goals besides teaching academics is to make sure that the Little Ones have skills in trade too. And, sometimes that means I have to learn right along with them! Since, I am not a leather artisan I had to rope my Daddy into giving me some guidance as to what I needed and how to do the basics. So, off we went to the nearest Tandy shop where I bought some leather tools, a leather kit, and some stain!
The Little Lady chose a small leather purse for the first project. I bought the basic kit that had cut holes in the leather pieces already. My Daddy doesn't do this because he makes his own patterns. However, there is no point in making us discouraged the first go around is there?
The Steps: (She was highly supervised!)
1st the Little Lady (age 6) is lightly wetting the leather to prepare it for stamping.
Choosing a stamp is the hard part! She couldn't decide so she used all three.
So, she took a leather stamp and hammered the end stamp to make an impression on the leather.
The results of the stamping. The one on the right was just pressed into the leather so it had not dried yet.
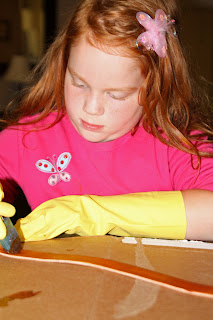
Once the leather is dried the next step is to stain the leather. We bought a light brownish orange color and with a paint brush she painted on the stain.
Here she is staining over the leather that she stamped.
(Long strokes in one direction. If you get to much you can take a cloth to even out the paint)
Sewing the leather strings through the holes to piece the leather together.
Finishing up the purse with a clasp.
A new handmade leather purse to treasure for years to come! Even though I have been told that it is too small. It doesn't fit a horse or a horse book. So, it looks like we will be getting some more projects and equipment to do some bigger projects.
Linked to: http://www.raisinghomemakers.com/


I need one of those!! Just a little bigger :)
ReplyDeleteShe did a wonderful job! Sure like how it turned out in color and with the stained stamps. Very nice. Sincerely, Mommy of two little blessings & so much more!
ReplyDelete